I still find myself regularly referring to Eugene Lim’s fantastic start-up guide for iOS penetration testing. My iOS testing device has a tethered jailbreak, so I sometimes find myself having to reconfigure my environment and when doing so, the details matter. Getting it right the first time ensures that you won’t spend hours troubleshooting something that used to work but is now inexplicably broken.
Android testing usually goes hand in hand with iOS testing, although setting up a testing environment on this platform is considerably more varied and can be confusing. This is mostly due to the wide range of devices in the Android ecosystem and each manufacturer’s different customizations of both hardware and software. There are plenty of guides out there on the topic, but I found them to be incomplete, incorrect, or poorly translated from another language.
Here’s what you need:
Hardware
- A physical Android device with root access - I have an old Nexus 5X. It still runs Android 8 and the below instructions anticipate that. I’ve seen a lot of recommendations for setting up a virtual device using Android Studio or Genymotion, but I have never gotten these solutions to match the capability and convenience of testing on a physical device. There are pros and cons to both physical and emulated, but testing on a physical device has always been the least painful setup for me; if it ain’t broke, why fix it?
- USB drivers for your device - Google devices (Nexus/Pixel) are a great choice as the driver is universal and available and these are “flagship” devices. Other manufacturers may provide drivers on their support website.
Software (on your host)
- Android Platform Tools
- Frida - You will need to install the client tools on your host system, and the
frida-serverbinary on your device (see below for a Magisk module which automates Frida server updates). - Objection - A great tool that works to bundle up some Frida features into an easy to use command interface.
- Burp Suite - For intercepting application traffic. There are others in this space (see Charles or ZAP), but Burp is the undisputed champion in this arena.
- scrcpy - Optional. A helpful tool to give you remote control of your device so you don’t need to work with an additional physical screen. I like to have the device screen right next to the terminal.
Software (on your Android device)
- ProxyDroid - You will need to direct traffic from your device to your proxy. You could do this with your network settings, but ProxyDroid makes it as easy as flipping a switch to bounce between a direct connection and a proxied one.
- Magisk - Magisk is great for modifying your device without “traditional” root access. I use these modules for testing:
- Move Certificates - Adds custom certificates to not just the user store (default Android behavior), but also the system store. You will need your Burp Suite certificate to live in the system store.
- MagiskFrida - Keeps the
frida-serverbinary up to date and also starts it automatically when the device boots.
Installing the Burp Suite Certificate
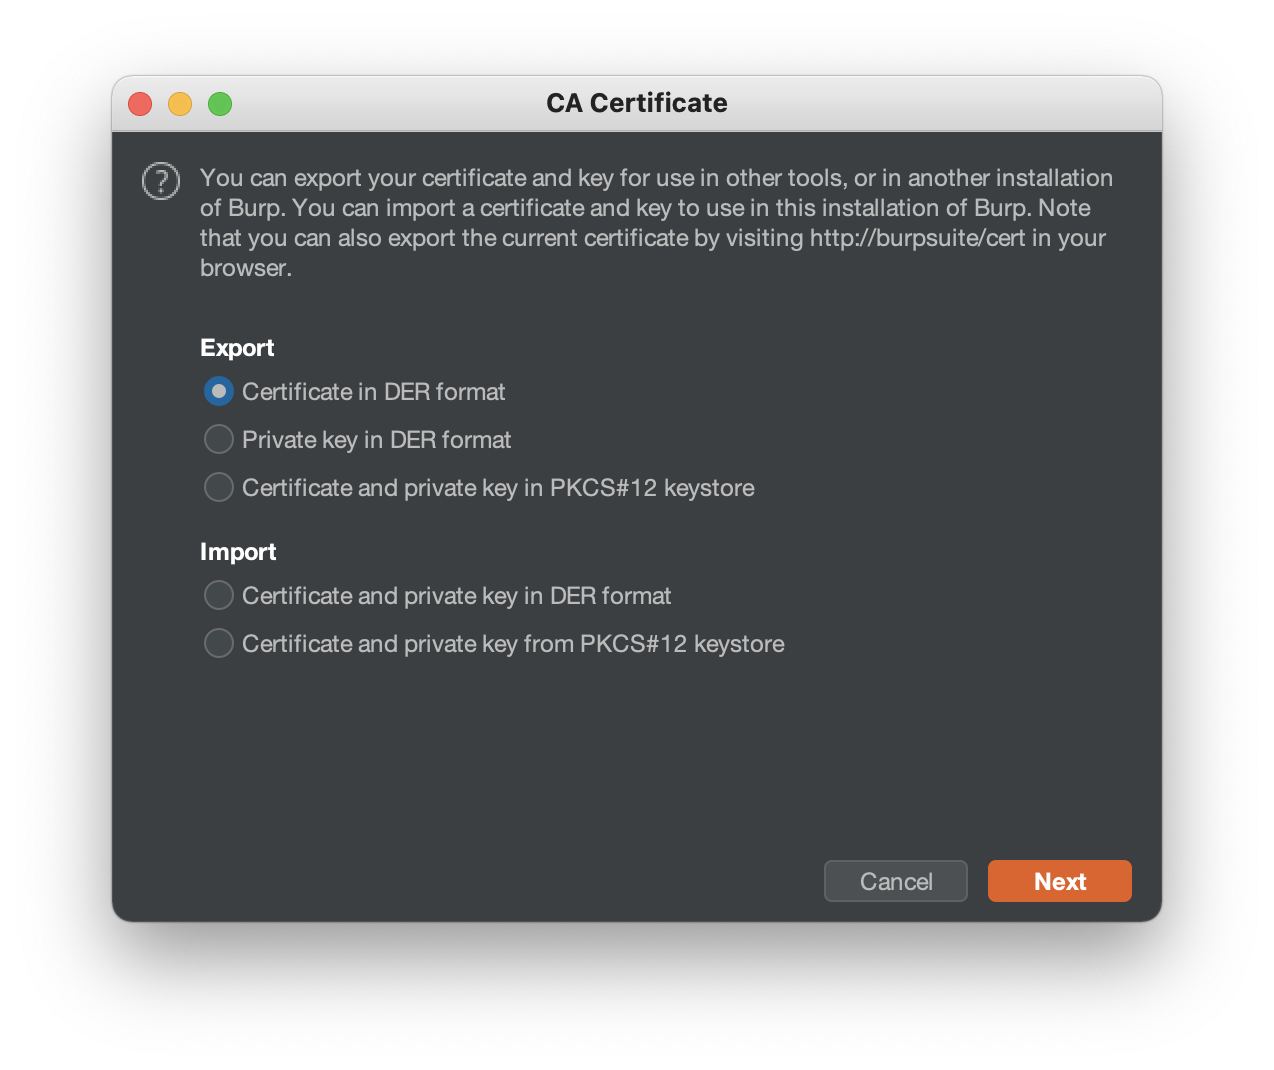
You will need to export Burp’s CA into a file. Navigate to Proxy > Options > Import/export CA certificate and export the certificate in DER format.

Convert the certificate to plain text with
openssl x509 -inform DER -in cert.der -out cert.cer
Transfer to the device using your method of choice. I usually just spin up a little web server with python -m http.server 9898 just because it’s quick and easy, especially if you don’t yet have a file manager installed on the device. You can then just browse to your host IP address and download the file. Alternatively, you could use adb push to transfer the file.
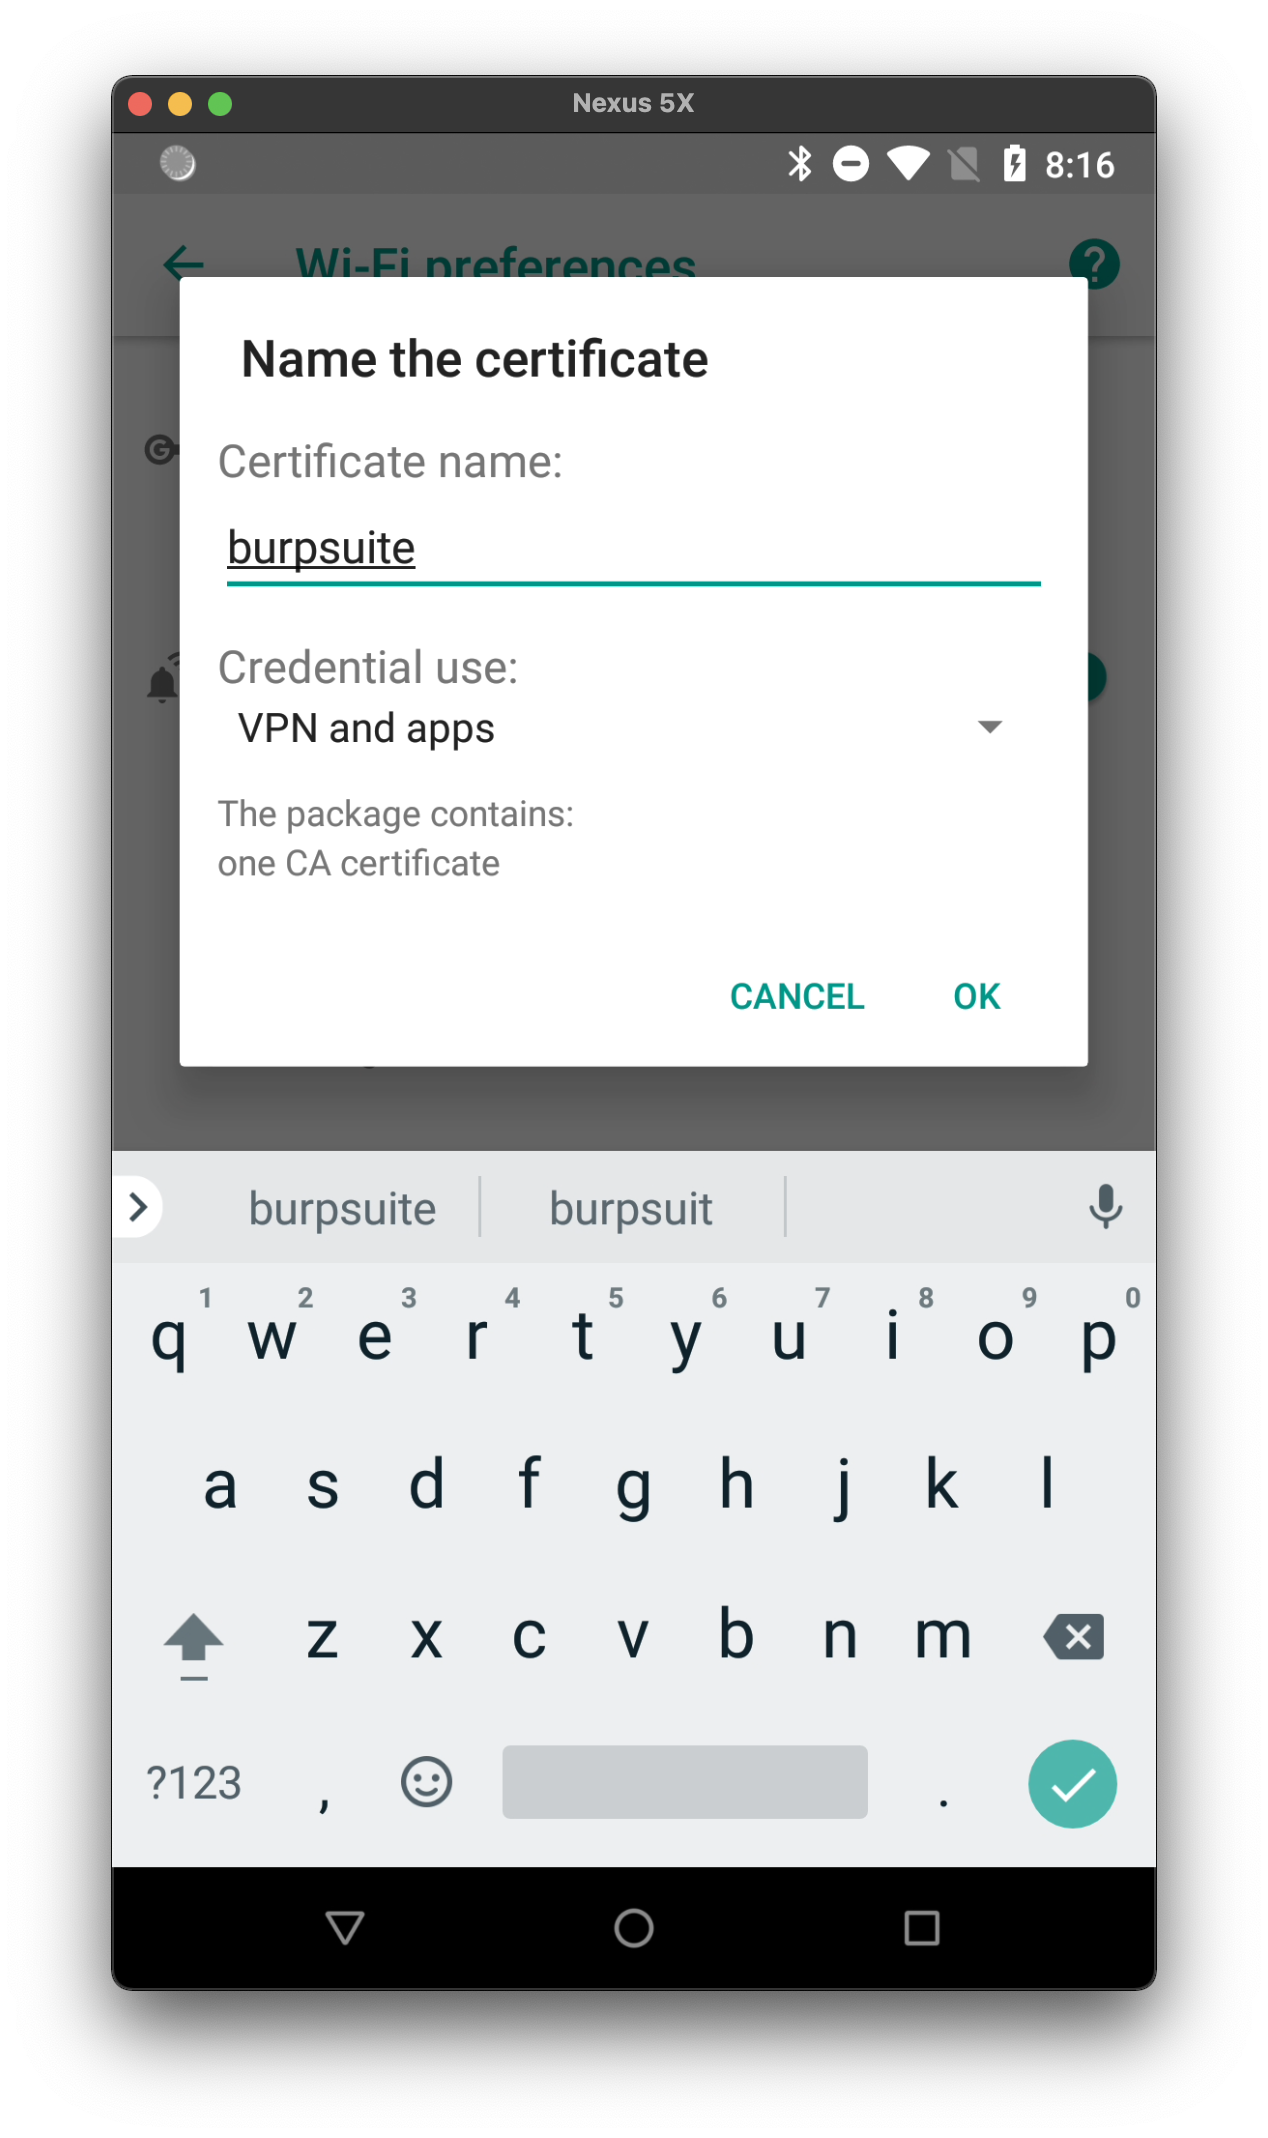
Once the file is on your device, navgiate to Settings > Network & Internet > Wi-Fi > WiFi preferences > Advanced > Install Certificates. Select the previously transferred CER file, give it a name, and install. As long as you have the Move Certificates Magisk module listed above, it will automatically copy the certificate from the user store to the system store.

Intercepting Traffic
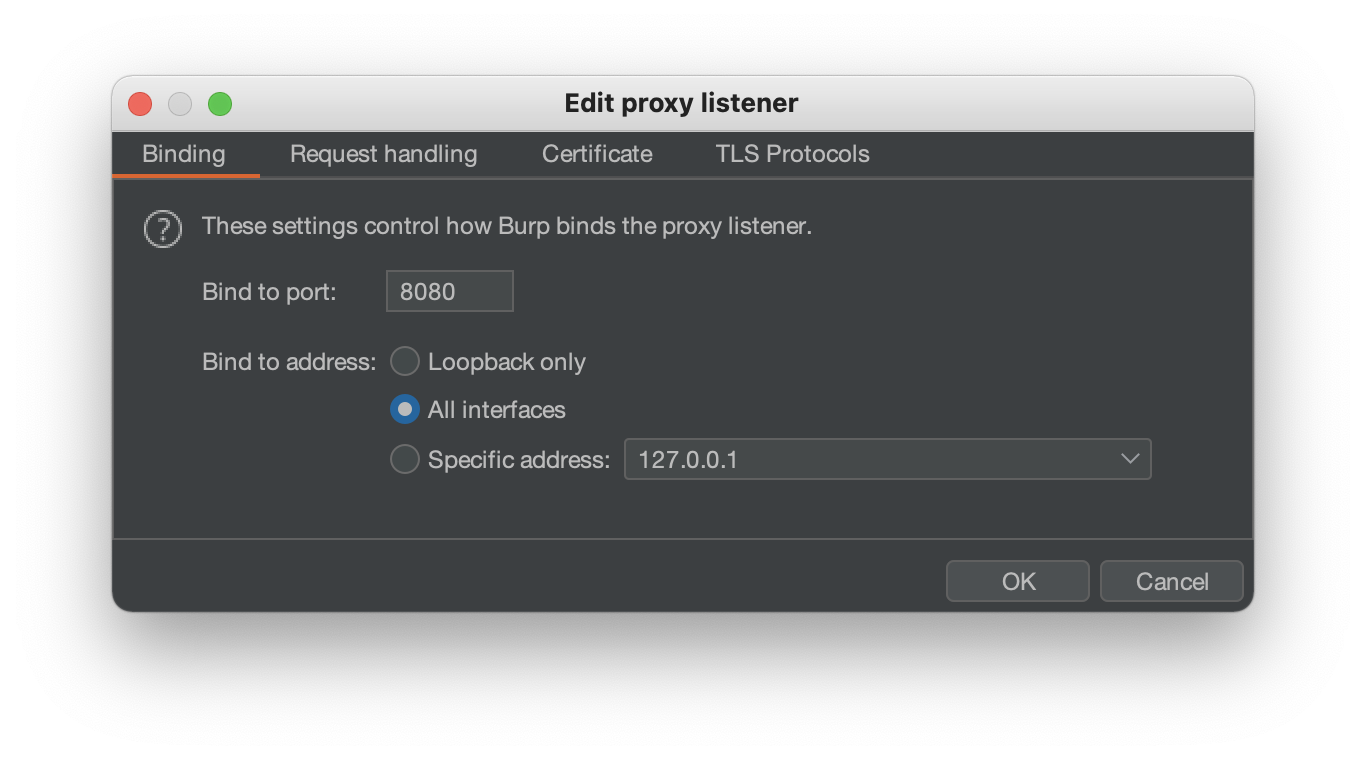
Open up Burp Suite and configure the proxy to allow inbound connections from other devices. You may need to also modify your host system’s firewall to allow this traffic.

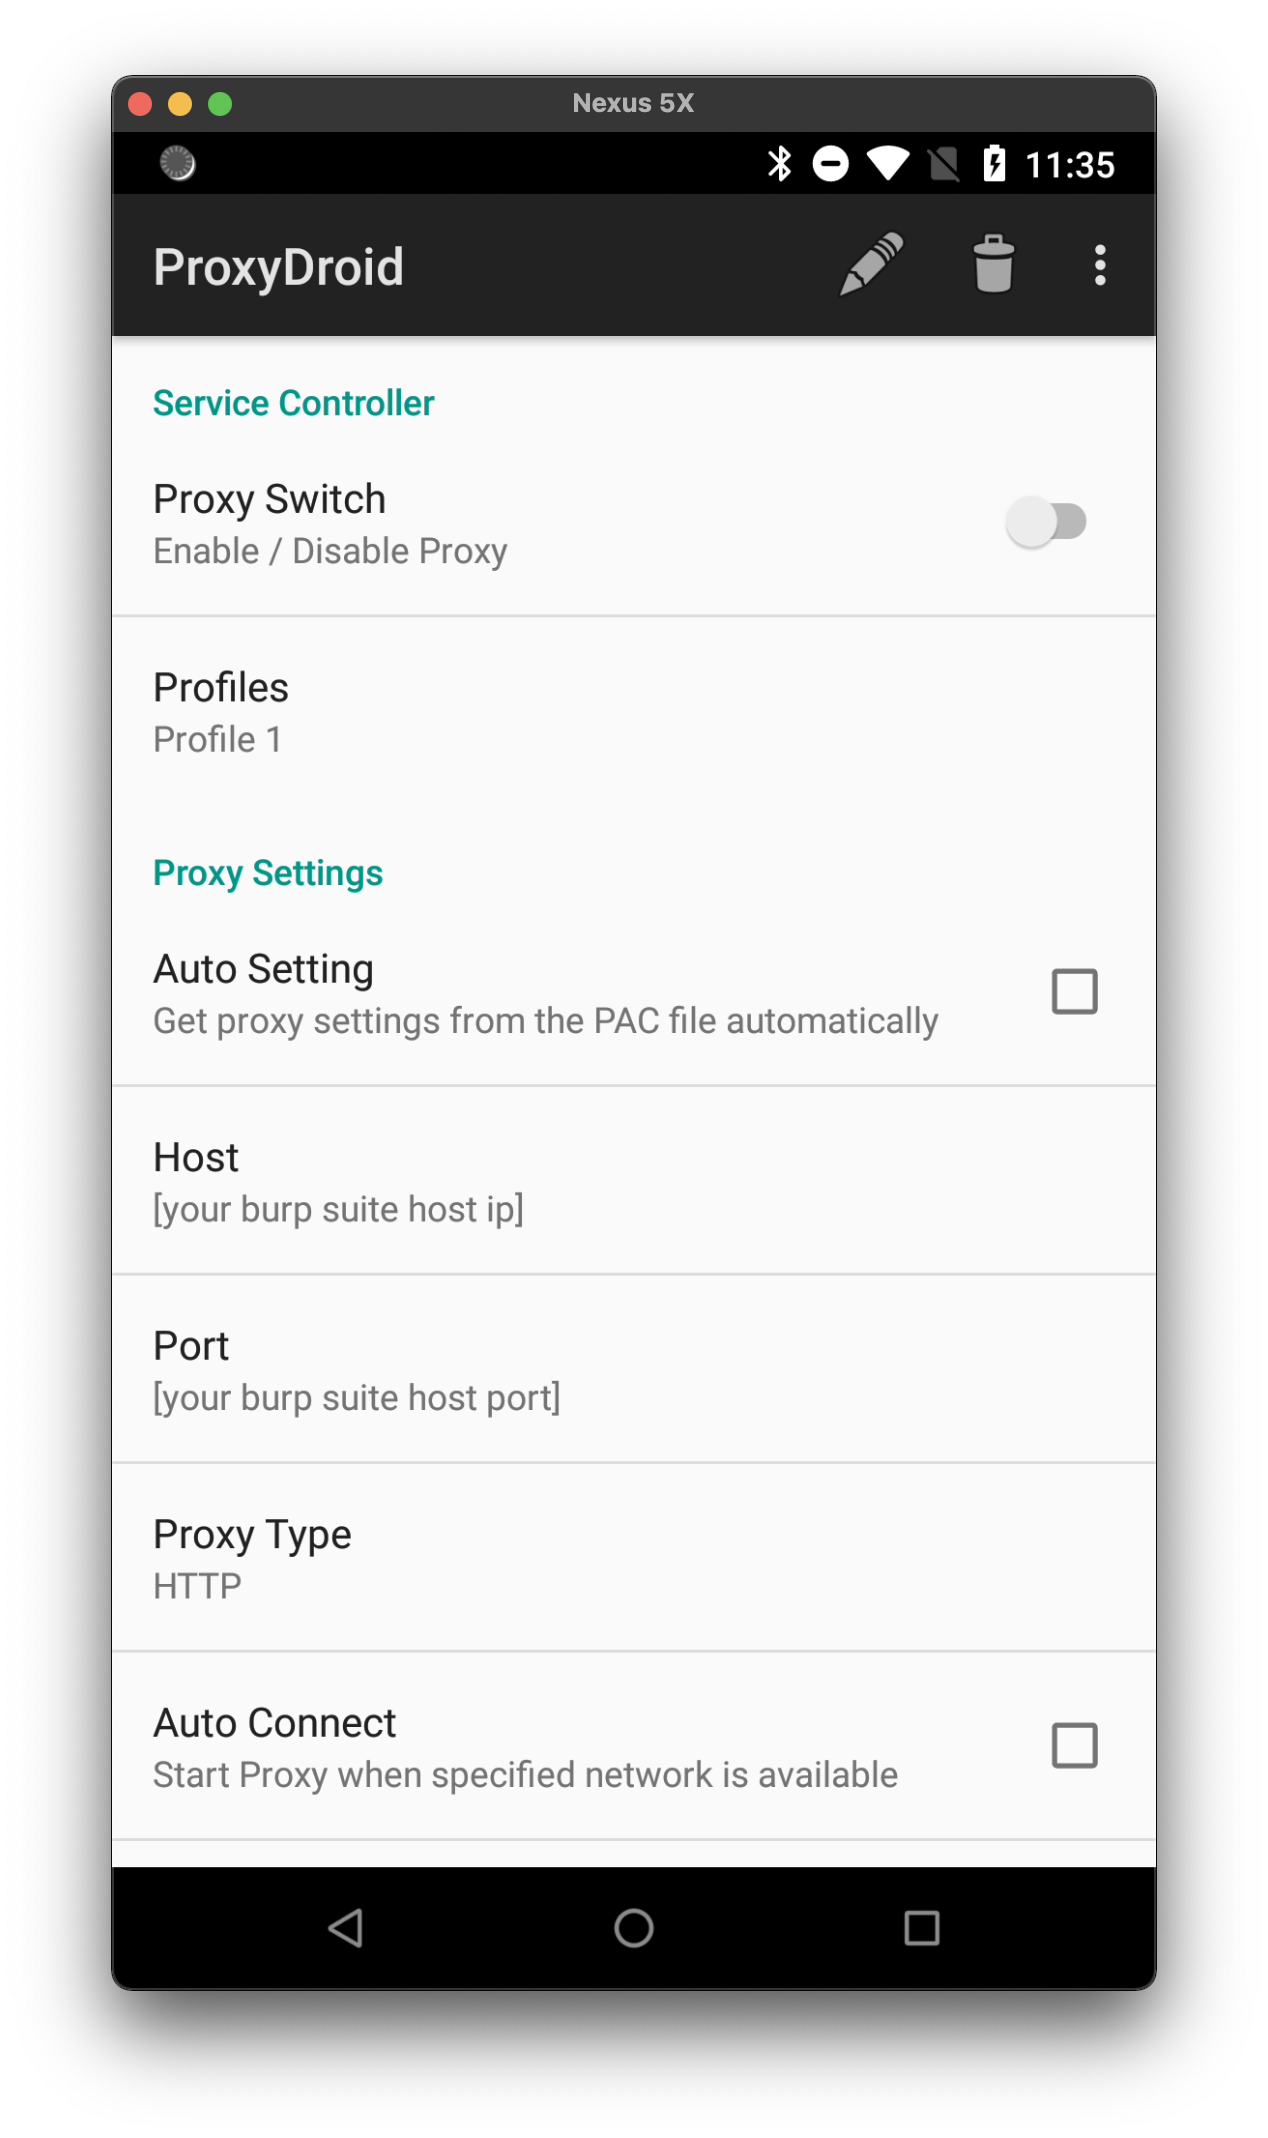
In ProxyDroid on your Android device, set your Burp Suite IP and port in Proxy Settings and then enable the proxy.

You might now start to see some traffic populating in Burp Suite. This is likely regular background Android traffic. You can silence these by defining a scope under the Target tab in Burp Suite.
Launching Apps for Testing
Ensure that your USB-connected device can be seen by the host system with adb devices. Your device serial should be listed in the output. If not, try unplugging and re-plugging the device, and ensuring that USB debugging is enabled in the developer options.
SMBP:~ sean$ adb devices
List of devices attached
00acXXXXXXXab942	device
After confirming the device is seen by the host, you can launch a basic Objection prompt to start poking around.
objection -g com.google.android.youtube explore
This command launches the YouTube app with the Frida hook injected. Typically, you will need to specify the bundle ID of the app (com.whatever.appname), and these can be found by running frida-ps -Uia when the device is seen by adb.
As the app is starting up, you may also want to run android sslpinning disable --quiet in your Objection prompt to attempt to circumvent SSL pinning the app may have implemented. There is no one-size-fits-all solution for bypassing SSL pinning, so this trick doesn’t always work, and some implementations can be very tricky to get around.
You do not need to use Objection to proxy your traffic, but the pervasiveness of SSL pinning will probably form a habit of launching apps this way.
Optional Single Screen Setup
You can use the free scrcpy tool to access your USB-connected device from your host system. If you don’t have a dock to hold the device, this is a great option for testing from a single pane. Those little on scren keyboards can get very annoying as well, so being able to type on a full size device will tremendously increase the efficiency and speed at which you are testing.
Conclusion
This only encompasses a very small part of mobile pentesting, and is only intended to get a pentester up and running in a usable environment. While this setup can intercept web traffic, one cannot neglect static/dynamic analysis of the binary as well, and understanding how it interacts with the Android platform.
The demand for mobile pentesting, of which Android is no small part, continues to grow. It will likely continue to grow as more and more properties move away from user-controlled browsers and into vendor-controlled sandboxes (apps). Users can’t easily block ads or tracking cookies in mobile apps, and the space will only continue to saturate, increasing the demand for mobile pentesting skillsets year over year.
